How to Pack for a Move (A Pro System, Not Tips)
Most people pack by collecting advice.
They look up tips, buy supplies, and start boxing things when it feels convenient. The problem isn’t effort. It’s order. Without a system, good advice still creates clutter, overlap, and last-minute decisions.
Professional movers don’t pack faster because they rush. They pack faster because they follow a structure that controls where packing happens, when it happens, and what stays untouched until the end.
This article explains that system and how to use it so nothing important gets missed.
Why packing tips break down
Packing tips are usually correct, but they’re incomplete.
They explain how to wrap something fragile, but not when it should be packed. They recommend box sizes, but not where finished boxes should live. Without structure, packing spreads into hallways, overlaps with daily life, and forces decisions later when pressure is higher.
A system prevents that by making order the priority.
How professionals think about packing
Professional packing isn’t about touching everything at once.
It’s about keeping the home stable while gradually reducing what’s left to manage. That means limiting where packing happens, separating finished work from active work, and protecting flow through the space.
This approach works whether you’re moving yourself or hiring movers, because the logic stays the same.
The packing system professionals use
Instead of packing everywhere, professionals divide the home into clear zones.
Each zone has one purpose, and items only move forward — never backward.
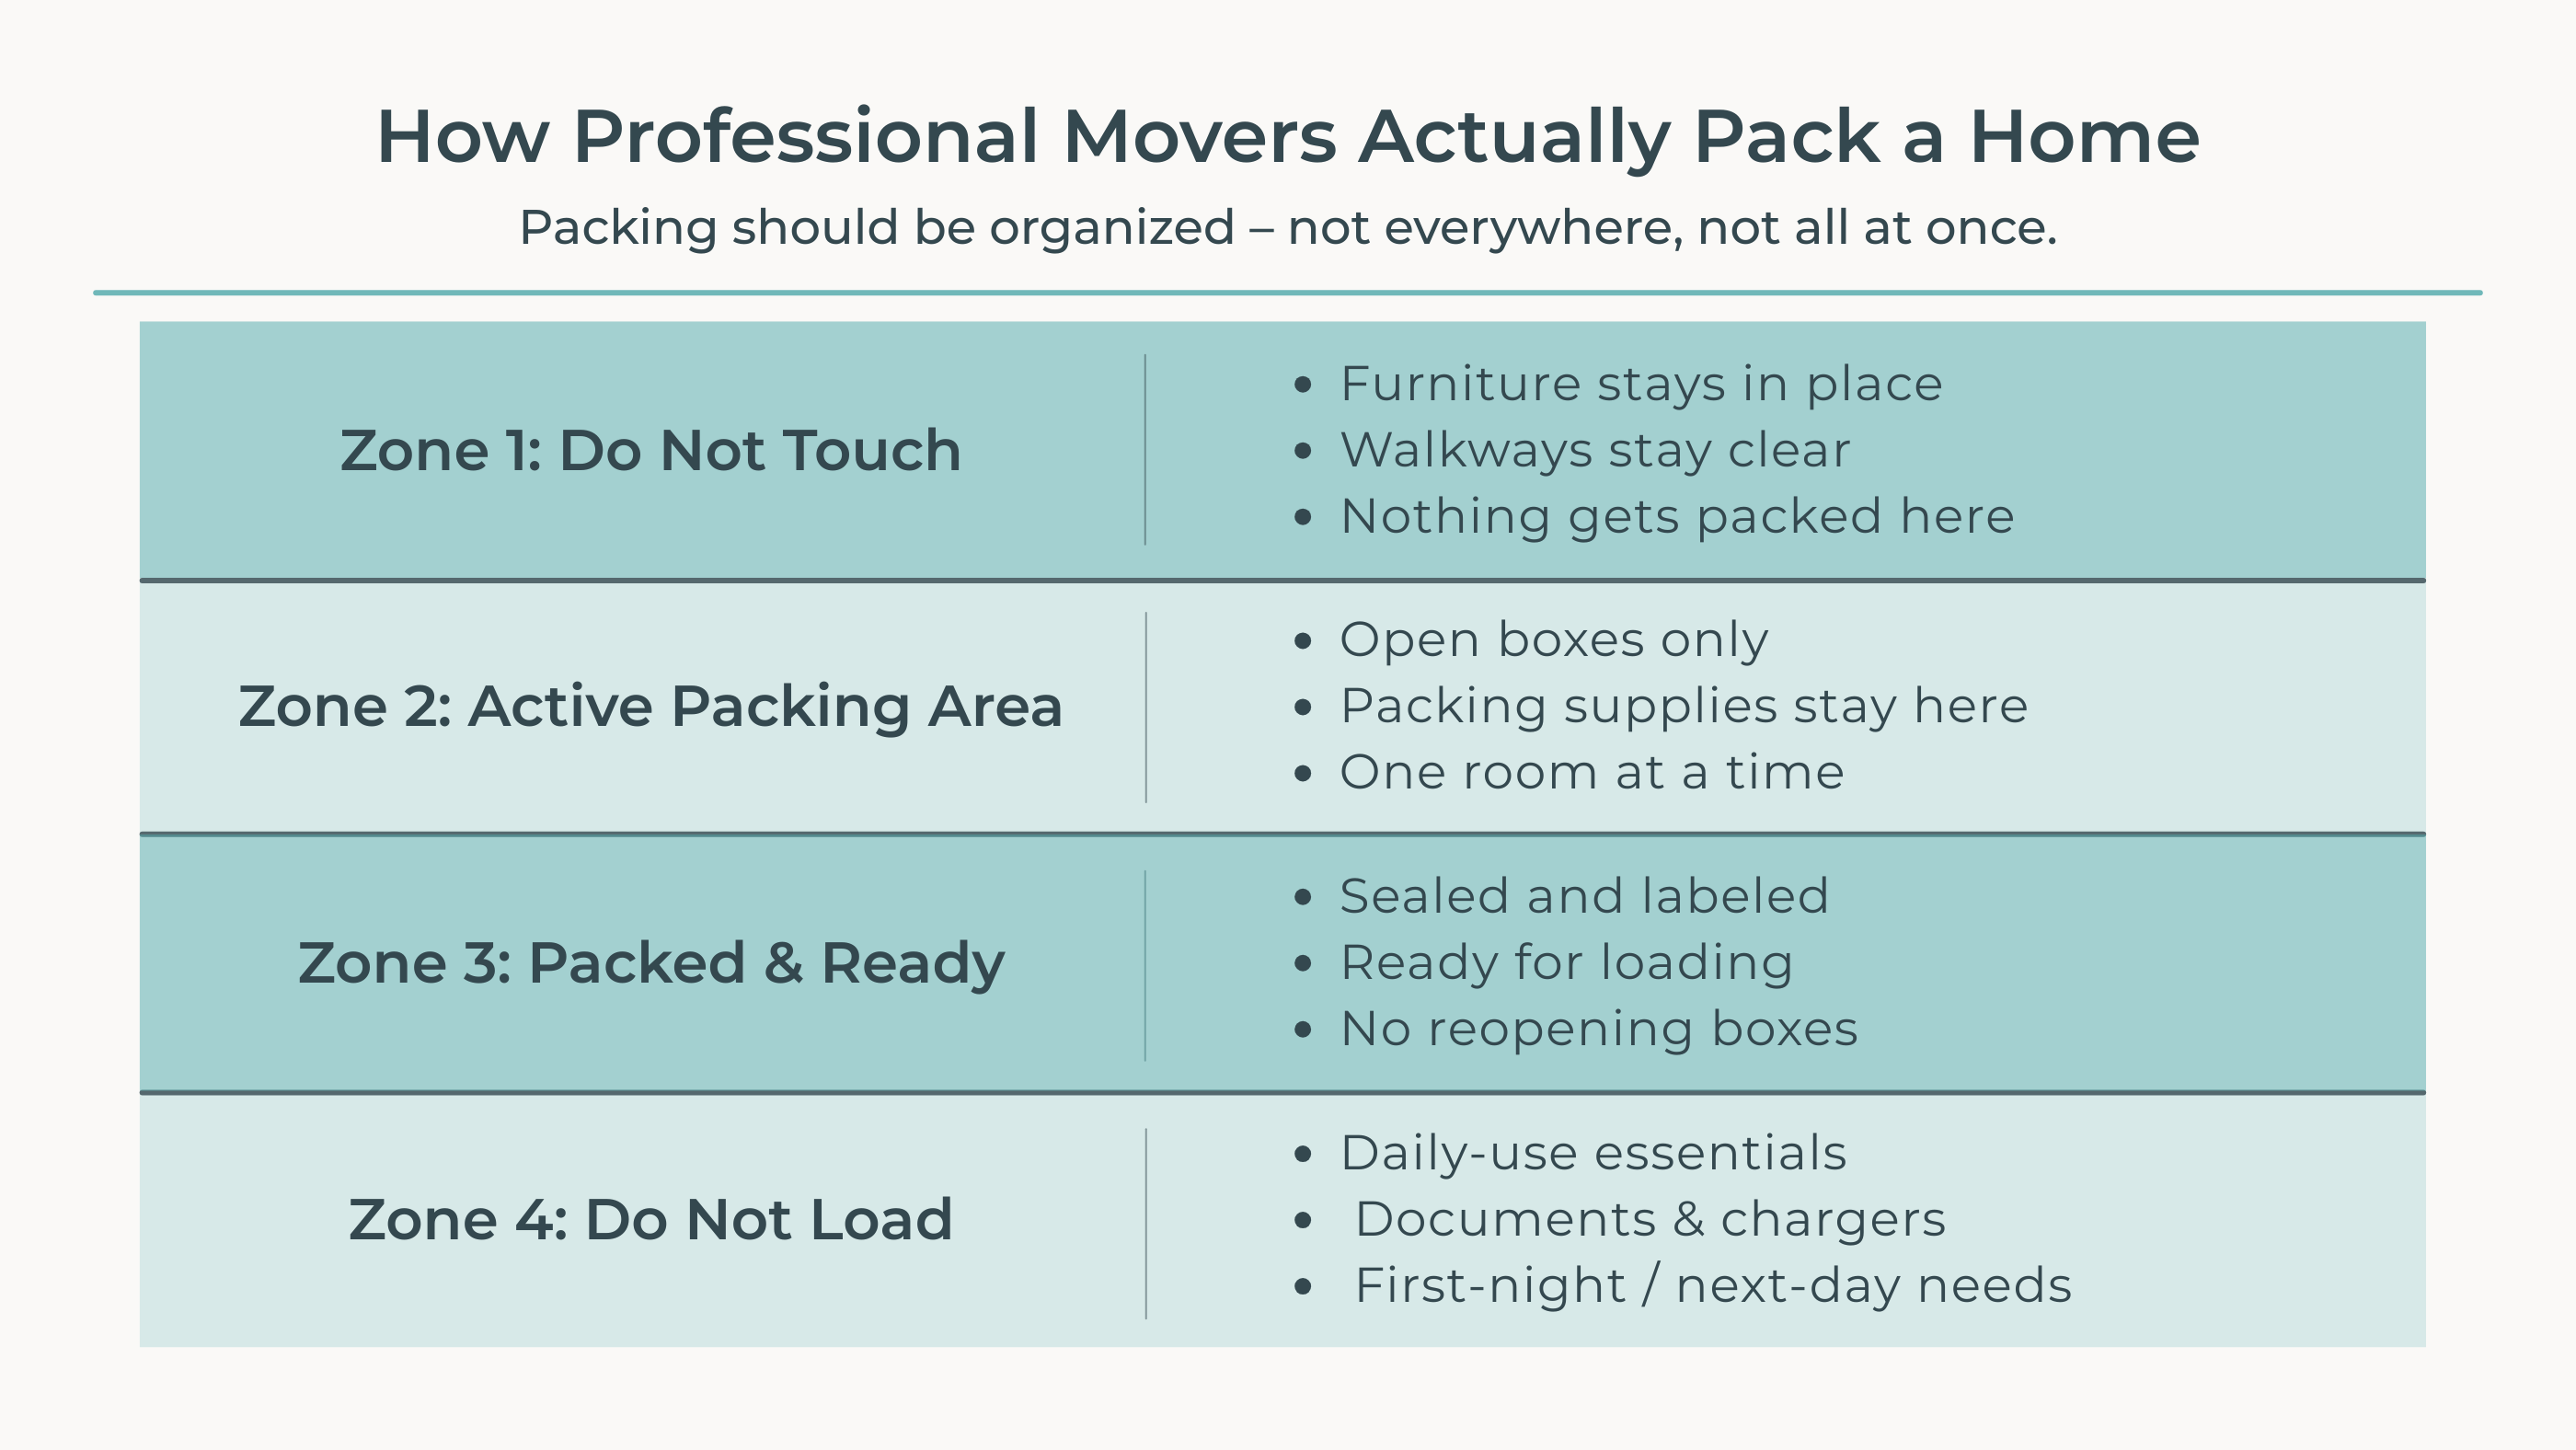
Zone 1: Do Not Touch
This zone keeps the home functional.
Furniture stays in place. Walkways stay clear. Nothing gets packed here. This prevents packing from spilling into daily life and blocking movement.
When this zone disappears, everything feels chaotic very quickly.
Zone 2: Active Packing Area
This is the only place packing happens.
Open boxes live here. Supplies stay contained. Packing moves one room at a time instead of spreading across the house.
When active packing stays controlled, progress is visible and manageable.
Zone 3: Packed and Ready
Once a box enters this zone, it stays closed.
Boxes are sealed, labeled clearly, and staged out of the way. Fragile, very fragile, and heavy boxes are marked so they’re handled and loaded differently.
Reopening boxes breaks flow and creates delays later.
Zone 4: Do Not Load
Some items should never mix with general boxes.
Daily-use essentials, documents, chargers, medications, and first-night needs stay separate and accessible. These items are packed last by design, not because they were forgotten.
Keeping this zone distinct prevents panic on moving day.
How this system prevents mistakes
The system works because it reduces decisions.
You’re never deciding where to pack next, where to put a box, or whether something should be reopened. Each item moves through the zones once.
That’s what keeps packing calm even when time is limited.
What to do first if you’re not sure
If packing feels overwhelming, don’t start with boxes.
Start by setting up structure. Decide which areas stay untouched, where packing will happen, and where finished boxes will live. Once the system exists, packing becomes mechanical instead of stressful.
→ View the free 1-Page Move Snapshot
Closing perspective
Packing works best when order comes first.
A clear system prevents small decisions from stacking into bigger problems later. When structure is in place, packing becomes predictable — even when the timeline tightens.
→ Explore the Moving Mentor Sy